
GST REGISTRATION PROCESS in INDIA
Any person falling under the laws of GST must need to get registered under the GST and have the GSTN. Click the link here to know, whether you are falling within limit GST registration threshold limit, https://taxacumen.in/?p=978 and to understand the benefits of the same https://taxacumen.in/?p=986
Here, we will not discuss again whether you are required to have GST or not, but to know step-by-step registration process to apply for the same.
Step 1
Go to the Website https://www.gst.gov.in/ and to register, go to the “Register” tab on the Right side in Top location. If you are here for the first time go to “New Registration” and if you already have TRN, Click to TRN.
Step 2
You will get to watch the screen as mentioned here, fill the details asked here to proceed when you dont have TRN already
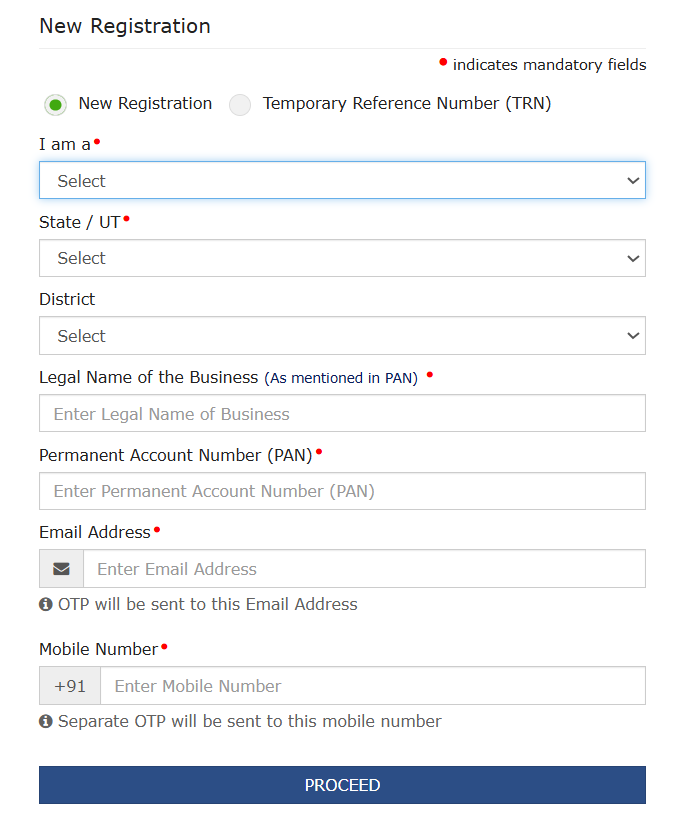
Select whether you are Taxpayer, Input Service Distributor(ISD), Tax Deductor, Tax Collector (Ecommerce Operators), Non Resident Taxable Person, GST Practitioner, or else.
Also, mention your legal name as per Permanent Account Number (PAN) only, Business Name can be differ.
Mention your email Address and Mobile number for OTP and all future correspondence with the GST Department. Make sure to provide active email and mobile number.
And after filling all the details and information here, Click on Proceed to reach the next page.
Step 3
You will receive a page to enter a valid OTP, here Email and Mobile OTP will be the same. You can check and mention any of them to proceed.
Step 4
Once the OTP you entered above verified and approved, you will get this Screen, where TRN (Temporary Reference Number) will be mentioned for you.
Save the TRN and write it down to your notepad for future correspondence. You will also get the said TRN through the text in messages and in your email mentioned in the application.
Step 5
Now, you have TRN with you to proceed for GST Registration. You must know that TRN will be available for 15 days to complete the process with the same TRN. Otherwise, a new TRN will be required.
Now you will login the Portal with your Received TRN and OTP to be received through your email and mobile both. After entering the OTP, you will be reached at a page where your Draft application is being shown.
Step 6
Here, you must complete this draft application within 15 days from generating the TRN. Till the date you didn’t get a GST Number from the GST Department, you can login with TRN for your registration.
Step 7
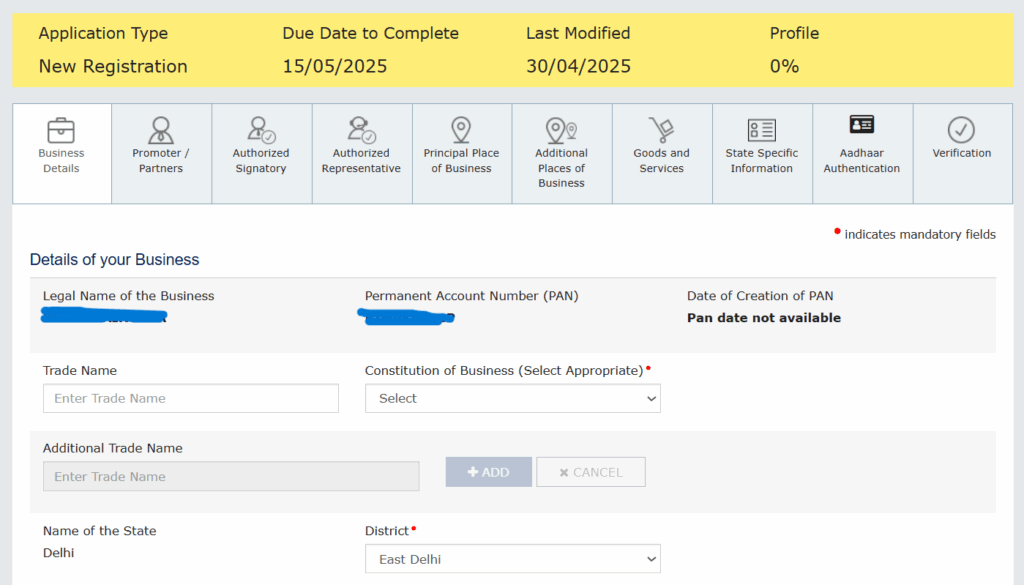
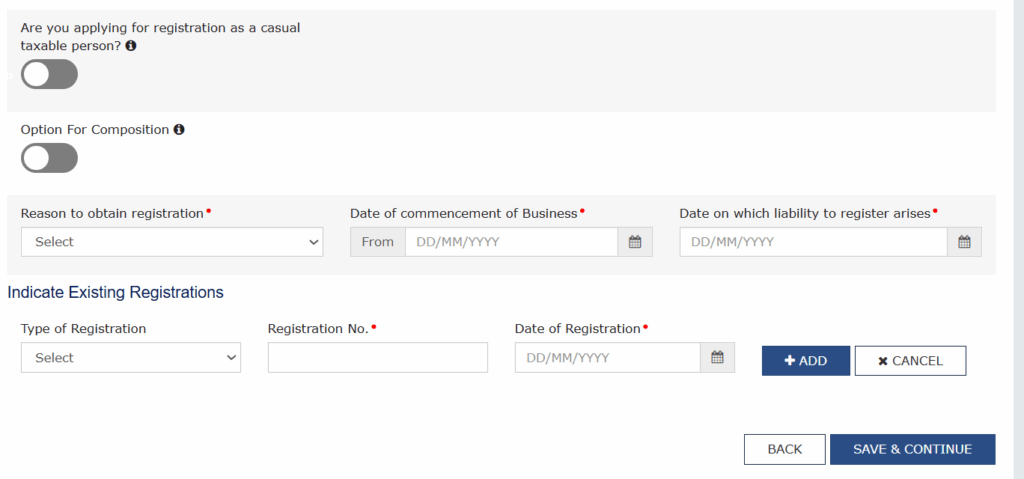
Here, you must provide Trade Name of business, Address details and proof of premise where the business is being operated, Personal details of Proprietor/Partners/Directors, Documentary proof of any additional premise for business to be attached, and all the details asked in the draft form must be provided.
Here in the image, this is only first page of the draft form. The Applicant must complete the entire draft application, then Profile completion % mentioned in the right side of the image will be shown as 100%
Step 8
Aadhaar Authentication process
After the completion of the draft form, verification process is being done according to rules and provisions. There is an option to do Aadhaar Authentication with biometric verification of the primary authorized person. Where the mobile number of the primary responsible person used for registration is the same number with which Aadhaar has been linked, it is possible to authenticate the Aadhaar online with OTP. It cuts the time process of approval from the department within 7 days.
Also, where a person opts to not to authenticate Aadhaar as described here before, he/she can upload an Aadhaar copy to complete the KYC process. In such case, the GST Officer must verify the principal place of business physically and the time limit to approve the GST Registration Application is within 30 days.
It is advisable and beneficial to do Aadhaar authentication with biometric verification for GST Registration.
Step 9
Approval of GST Application
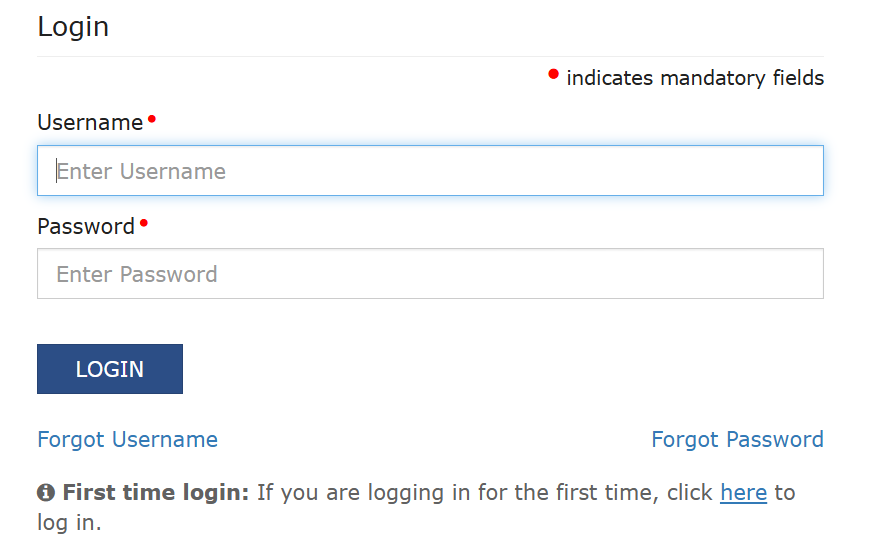
Once the department is satisfied with all the details mentioned here and documents attached, the application will be approved. The applicant will receive an automatically sent mail having the login credentials in it.
Login path for First time users must be used, Here, Create the User Id ( not changeable) and change the system password given by the department through the mail.
Step 10
Bank Account Update
Generally people thinks GSTN is received and work is done. But, this is untrue. The registered taxpayer must add their bank details with a cancel cheque or bank passbook first page mandatorily within 45 days from the date of registration granted.
In case of non compliance, the department can cancel the GST Registration after the deadline passed.
About Author – Deepa Kaintura
I am a lawyer by profession. I am a legal consultant in TaxAcumen providing services to corporates about GST, Income Tax, ROC Compliances, etc. My love for finance and law encouraged me to write and share the knowledge with the readers here. For any query, reach us at
WhatsApp : +91-9267970588 Email I’d:taxacumen.consultancy@gmail.com
Leave a Reply